

myUVU Workplace: Adding Announcements (including People & Culture and PACE)
Access and logging in to Modern Campus CMS
Please note: these instructions are for specific users only. Permission to create new announcements in myUVU Workplace is only available to designated users of Modern Campus CMS. If you believe you should have access to create News items in myUVU Workplace, please submit a request to WMS.
If you have not yet gone through Modern Campus CMS Basics training and been granted access to Modern Campus CMS, please do so before attempting to add content to myUVU Workplace. This document does not provide general instruction on working in Modern Campus CMS.
- Navigate to https://my.uvu.edu/workplace/announcements/ and scroll to the bottom of the page and click on the UVU logo at the bottom right
to be taken to the login screen. Log in using your usual UVU login credentials:

- After logging in, use the breadcrumb to navigate into the appropriate folder for the
announcement:
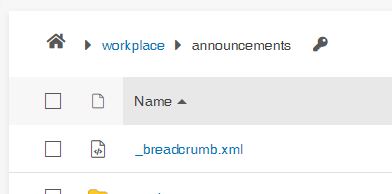
- Navigate into the folder for the appropriate year and month. The folder for each month should have its own /images folder where images for stories published during that month can be uploaded. If a folder is missing an /image folder, or if the /image folder does not allow image file uploads, please submit a web fix request to WMS.
Creating an announcement
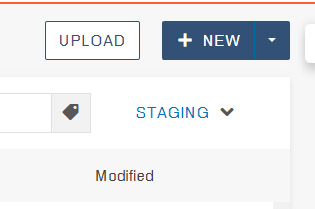
- Once you have navigated to the appropriate folder, click the "New" button in the upper
right corner to create a new page:
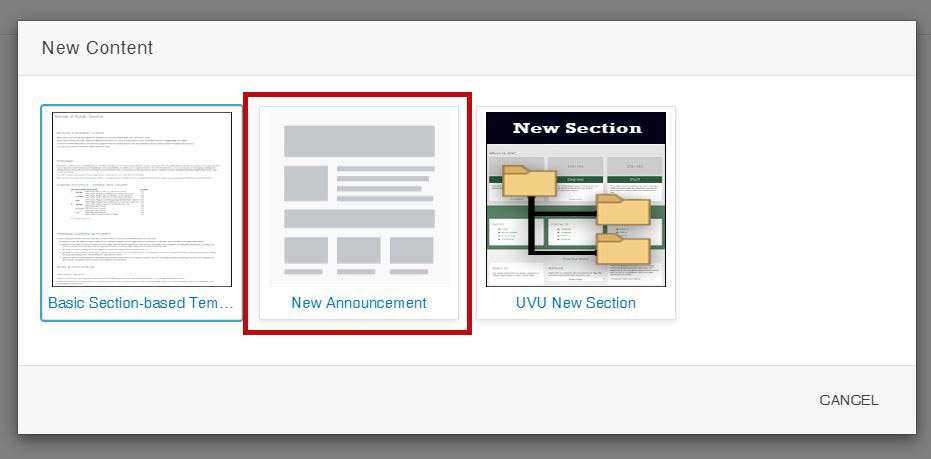
- Choosethe "New Announcement" page type:
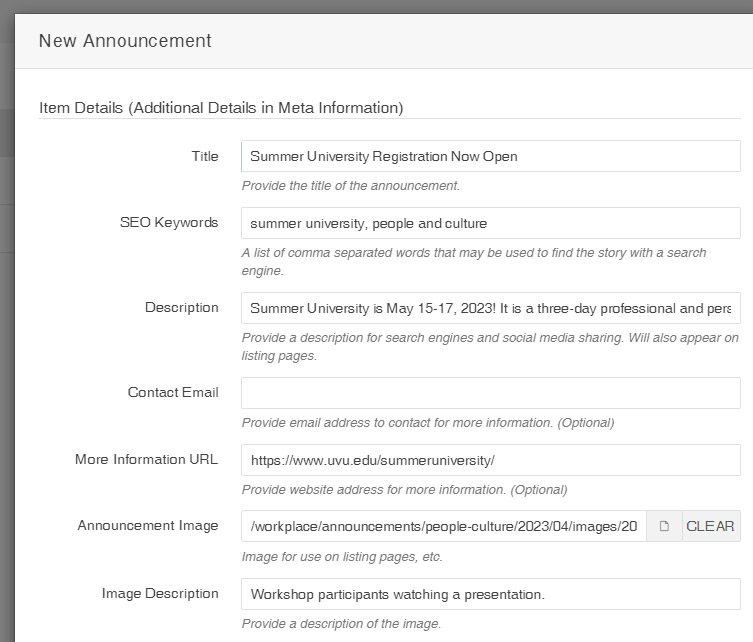
- A new page wizard/form will appear. Populate the fields with the content and details
of the story.
- Story Details
- Title: This will appear on landing pages, listing pages, and individual story pages.
- SEO Keywords: enter a few comma-separated words or phrases that identify the content of the story. This will not appear on the published page, but is used to help visitors find the story in the internal myUVU search.
- SEO description: enter a few sentences giving a summary of the story. This will appear on listing pages, landing pages, and on individual story pages.
- Contact Email (optional): If there is an email contact related to this announcement, enter the email address here. This will appear on listing pages and individual announcement pages.
- More Information URL (optional): If there is a website that provides more information about the announcement, enter the URL here. This will appear on listing pages and individual announcement pages.
- Announcement Image: Browse for the image that you would like to be associated with the item. There is not a specific image width/height that should be used, but the image should be sized to a 16:9 ratio. Be mindful of image file sizes. It is usually more convenient to upload and publish the image before creating the story. This image will appear on listing pages and inidividual announcement pages.
- Image Description: Provide a brief, meaningful description of the image that can be used to provide information about the image to visitors using assistive technology. ("Picture" is not a meaningful description.)
- Properties
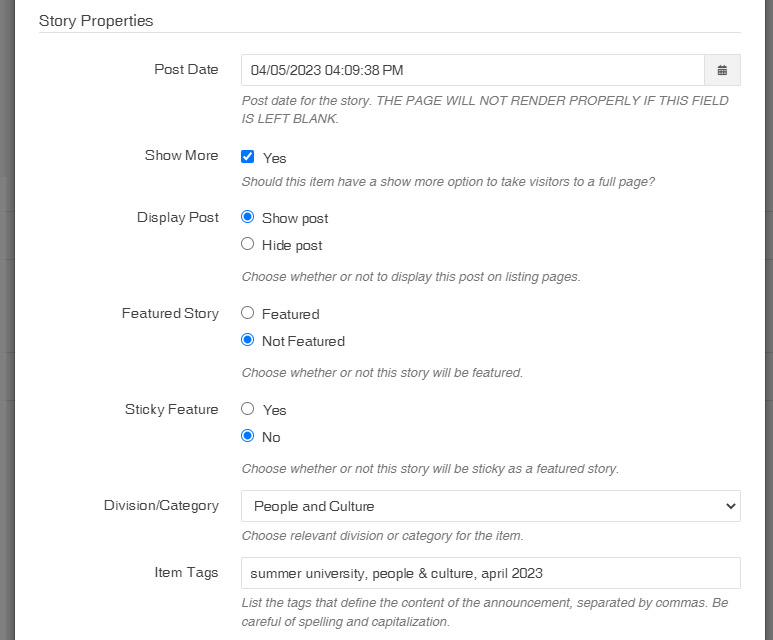
- Post Date: Select the date that the story is being created/published.
- DO NOT SKIP THIS FIELD. THE PAGE WILL NOT RENDER PROPERLY IF THIS FIELD IS EMPTY.
- Note that in most instances, items are listed chronologically based on the date entered here.
- Show More: If you would like the announcement to open in a separate individual page rather than as a pop-up window, check this box. This is useful for announcements with more than a few lines of text.
- Display Post: Choose whether you would like the story to appear on landing pages and listing pages.
- Featured Story: Choose whether this story should appear in the "Featured News" section on the myUVU Workplace landing page. (Applies to Division News stories only; Featured News stories will automatically appear in the "Featured News" section.)
- Sticky Feature: Choose whether this story should take precedence over more recently published stories in the "Featured News" section.
- Division/Category:Choose the relevant division or category for this item. This will affect where the announcement appears on landing pages.
- Item Tags: Enter a few comma-separated words or phrases related to the content of the story. These tags will appear on announcement pages and are used to help visitors find other similar content. Please be consistent in capitalization, spelling, and punctuation. (The system treats "UVU" as a different tag that "uvu" or "Utah Valley University.")
- Post Date: Select the date that the story is being created/published.
- Page Layout
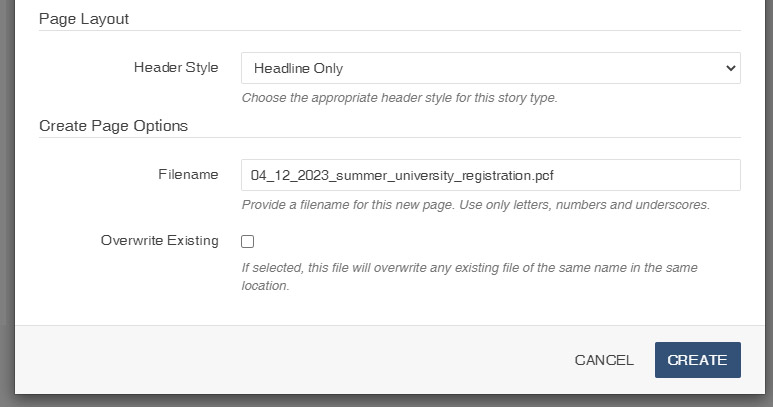
- Header Style: Choose a header style option.
- Note: additional page layout options will be available after page creation in the page properties.
- File name: Type a file name for your story. File names must be all lower case, with no spaces. Underscores and hyphens are allowed.
- Story Details
- Click "Create" to create your new item.
Adding and Editing Content
Editing pages
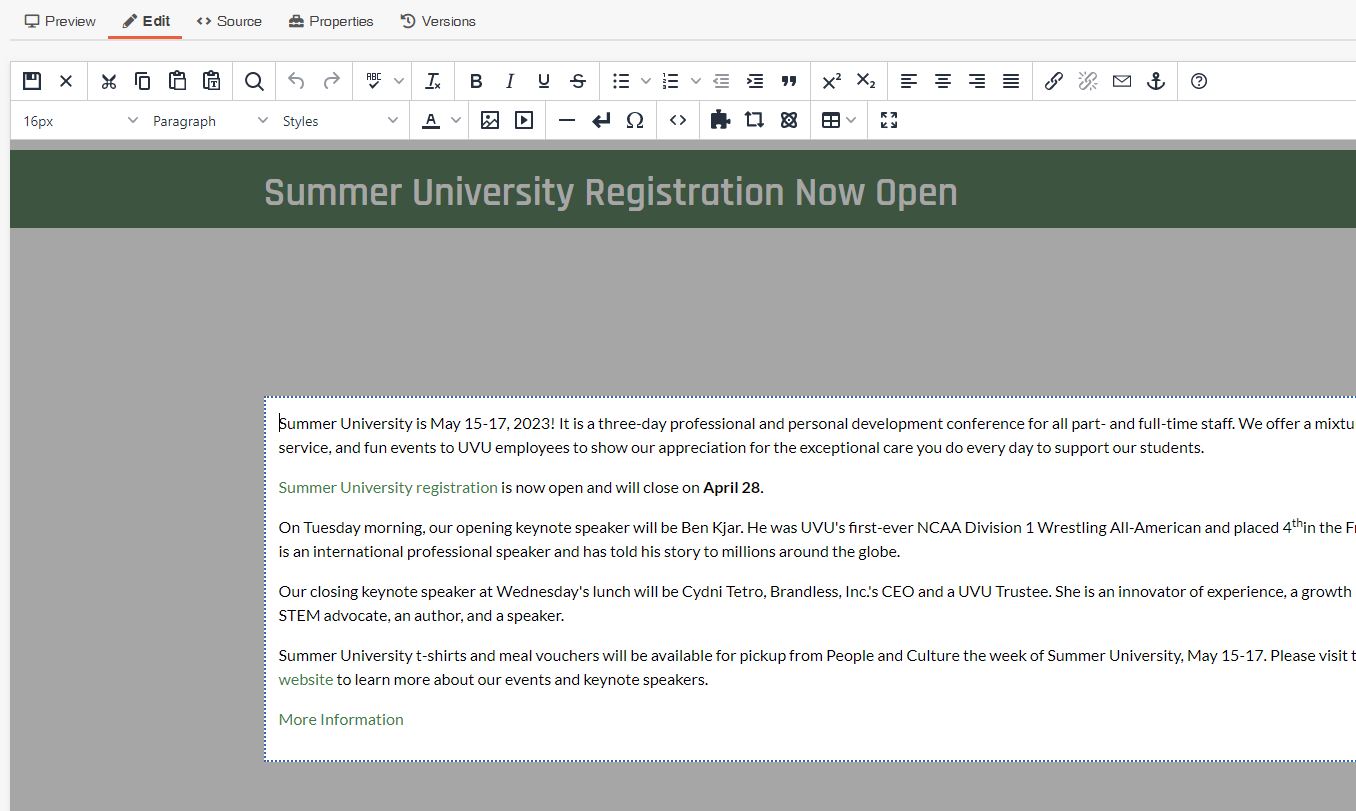
After creating the page, add additional content for your announcement. The SEO description, contact email, and "more info" URL should auto-populate (if added), but can be modified or removed as needed.
At this point pages can be edited in much the same way as other pages in Modern Campus CMS. If you are not familiar with editing pages in Modern Campus CMS, be sure to review the Modern Campus CMS basics training in UVU Learn and/or review the Web Community Modern Campus CMS documentation.
- Editing page content in Modern Campus CMS
- Formatting text in Modern Campus CMS
- Working with images in Modern Campus CMS
- Adding links in Modern Campus CMS
Page Properties
To change page settings and details, check out the file and review the Page Properties.
- Editing and updating file settings
- Understanding page structure
- Learn how to change page layout options
- Learn how to change page header options
Page content
- Can I add pictures to my announcement?
- Can I add video to my announcement?
- Can I add an image gallery or image slider to my announcement?
- Can I link to other pages/sites in my announcement?
- Can I change the layout of my announcement page?
- Can I choose a different header style for my announcement?
Publishing
Once your page is complete and ready to go live, be sure to publish your page. First, you may choose to use the page check tools in Modern Campus CMS to check for spelling, broken links, and accessibility.
Depending on the announcement category selected in the page properties, as well as the folder where the item was created, it will appear either in the announcement sidebar, the People & Culture section, or the PACE slider on the myUVU Workplace landing page. Check to make sure your newly-published item is appearing as expected.