Faculty Sites: WordPress basics
WordPress dashboard
When working in WordPress, you will usually begin from your dashboard. From the dashboard, you can create new posts, create new pages, make adjustments to styling, install new plugins, create backups, and perform other tasks within the WordPress system. For in-depth details on working in the dashboard, visit wordpress.org.
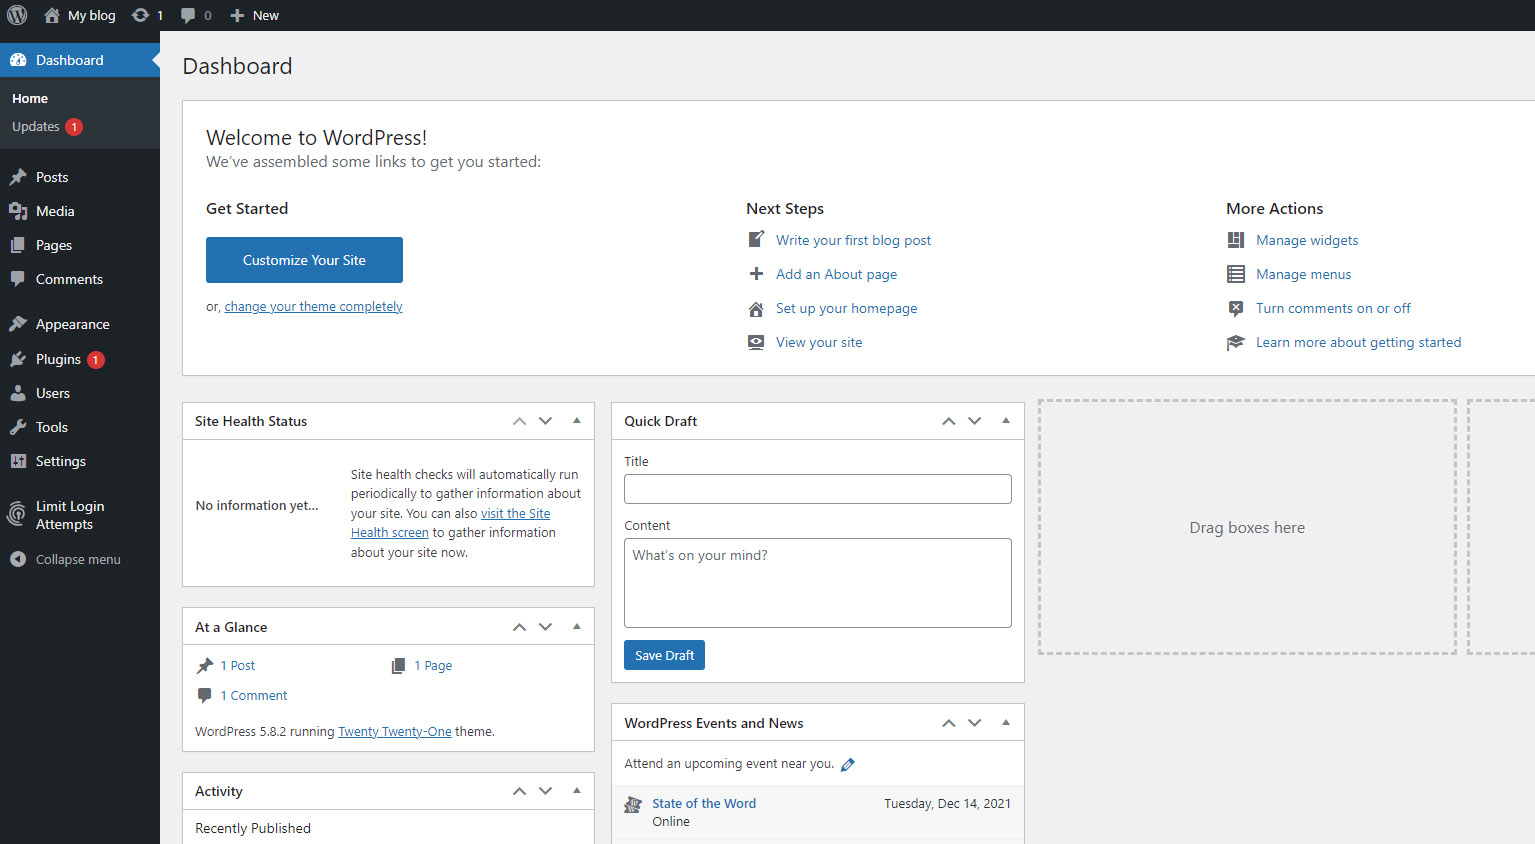
Customizing your WordPress site
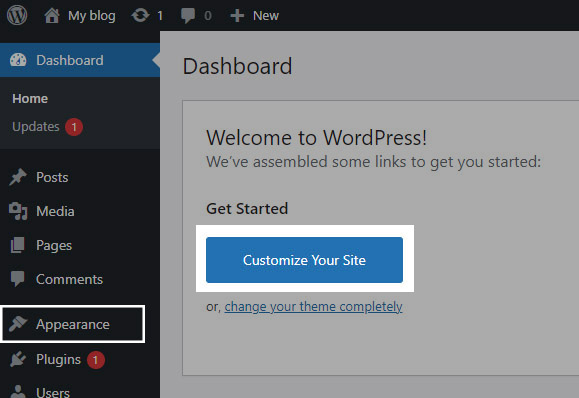
- To customize your site, including selecting a new theme, changing your site name,
adjusting widgets, and selecting menus, while on your dashboard, click on either the
"Customize Your Site" button, or select "Appearance" from the menu on the left to
access the Appearance menus:
- You will be able to choose from a variety of customization options:
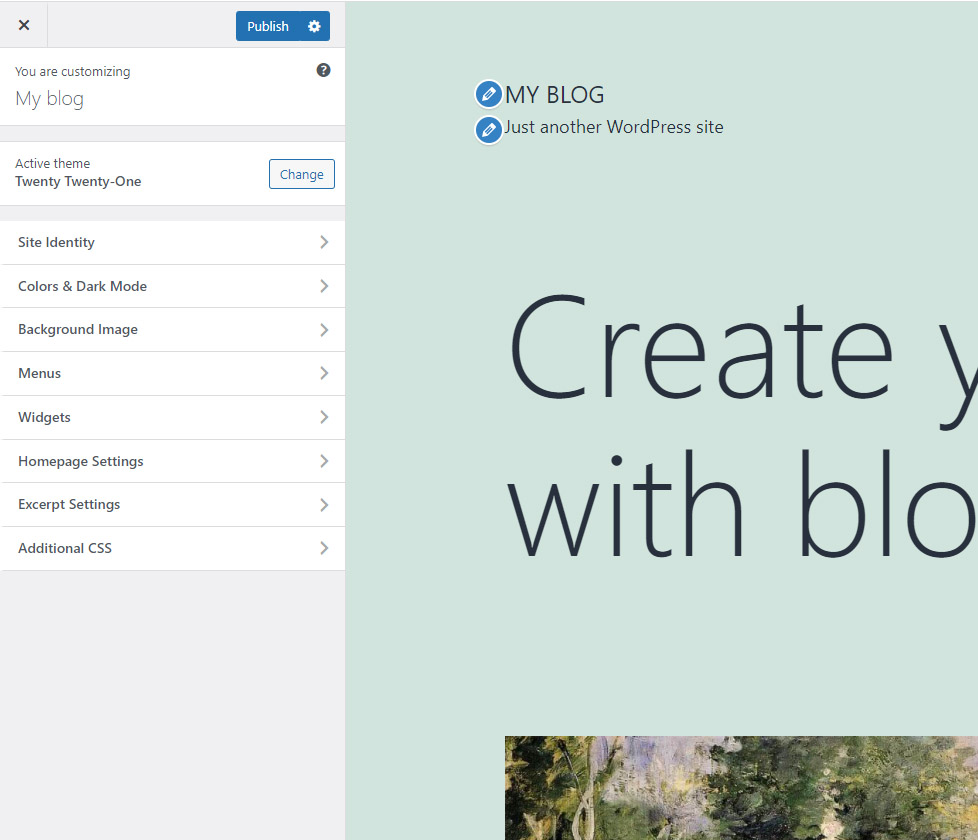
- Active theme: select your preferred theme from a library of available options. Learn more about themes in WordPress.
- Site identity: change your site name or site tagline. You can also upload an icon for your site.
- Menus: select menu options for your site. Learn more about using menus in WordPress.
- Widgets: add widgets to your site. Learn more about using widgets in WordPress.
- Homepage settings: choose what visitors will see on the homepage of your site.
- Theme settings: make adjustments to theme settings.
- Theme SEO Settings: update the SEO information about your site for use by search engines, social media, etc.
- Additional CSS: add additional styling by inserting your own CSS code.
Selecting a new theme
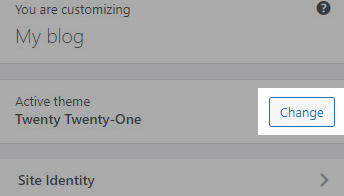
- To select a new theme, while in the Appearance menus, click the "Change" button next
to "Active theme":
- Choose a new theme from the existing installed options, or browse additional themes
on WordPress.org by selecting the corresponding radio button:
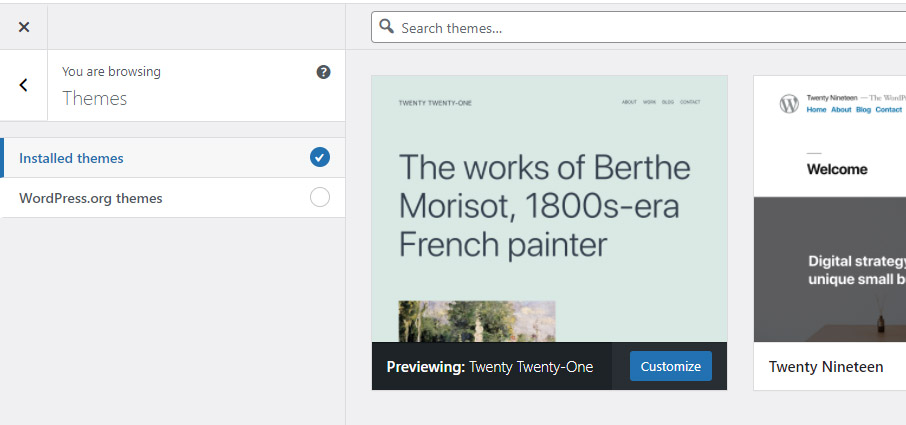
- Hover your mouse over each theme and click "Theme Details" to get more information about each theme. You can preview a theme before installing by clicking the "Live Preview" button.
- When you find a theme you would like to use, choose "Activate" to install that theme for your WordPress site.

